If you own a domain and want to connect with Cloudflare CDN to get better performance and security, then you are at the right place.
In this particular post, I will guide you on “How to connect a domain with Cloudflare” and I will use big rock as a domain provider, in your case, it will be different from GoDaddy, and Namecheap but all the steps are the same.
So let’s start this guide.
How to Connect Domain with Cloudflare?
Follow these simple steps to connect your domain with Cloudflare and enjoy its performance and security services for free:
Create a Cloudflare Account
To connect a domain with Cloudflare you need a Cloudflare account first so first create a Cloudflare account.
- Search Cloudflare on google or click on Cloudflare Signup
- After Successfully creating an account, you will be redirected to the Dashboard.
Add a Site/Domain to Cloudflare
Step 1. Add a Site
Once you have signed up on Cloudflare, you will be redirected to the Cloudflare dashboard page.
Now Click on Add a Site, on this page but if you have not added any site yet then you will see enter domain option directly shown in the 2nd step.

Step 2. Enter Domain Name
Now, Enter your site domain (Naked/Without www) and click on Add site Button.

Step 3. Choose a Plan
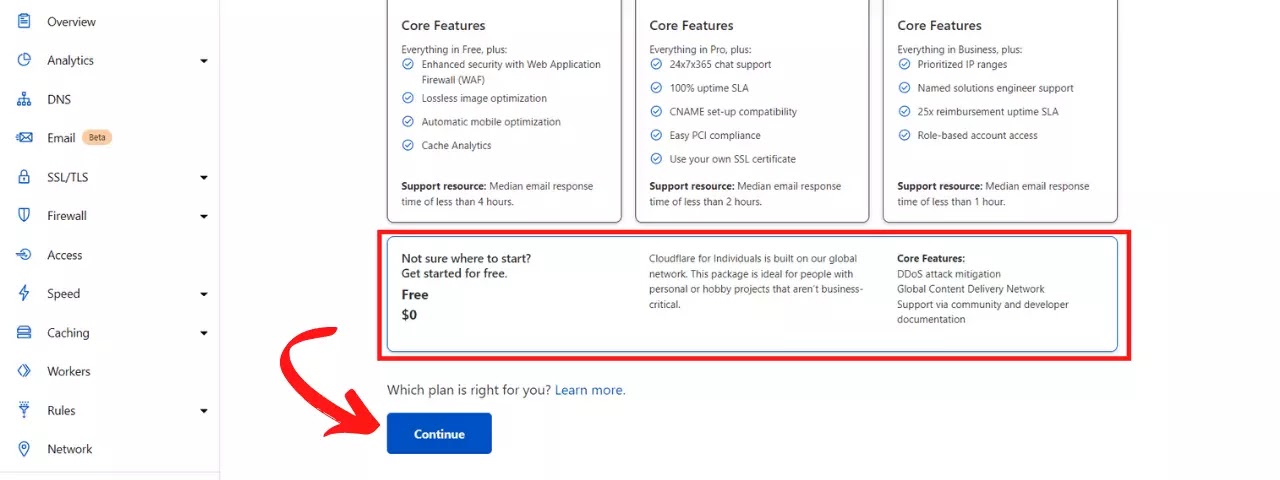
Now Choose a plan according to your need after comparing the plans and if you are happy with the FREE version choose Free 0$ Plan and click on continue.

Now Cloudflare will scan your DNS records and you can review and add the DNS record from this page.
Step 4. Review DNS Records
I Will Suggest you don’t change any DNS records here, it is recommended to change DNS records after the domain connects with Cloudflare.

Click on the Continue button after reviewing DNS records for your domain and now you will be redirected to the Change NameServer page
Step 5. Change Default Nameserver
Now We need to replace the Cloudflare default nameserver with our domain nameserver, we just need to remove all of our domain nameservers and add two Cloudflare nameservers that are given on this page.
Login to your Domain Registrar website, in my case my domain is registered on GoDaddy.
After logging in Click on Manage domain

Now Go to DNS management/settings and replace the nameservers with Cloudflare nameservers and save.

Now Wait for Some time to propagation the Nameservers changes, it will take upto 24 hours, after propagation your domain will connected to your cloudflare account.
Now you can use cloudflare proxy and it’s services.
Final Words
In this Article i explained how you can connect your do,ain with your cloudflare account, i hope you liked it.
If you have any doubt and query regarding this tutorial fell free to comment below


